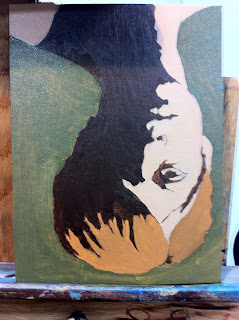
I decided to work on two canvas simultaneously. First because I had a prepped panel and a close up of the model from last week and It was holiday Monday and I didn't have a color print out of my portrait yet. I didn't have a chance to get one done since I was in Animation Lockdown all Long week-end. So this bit is a reminder of the steps before we get into the nitty gritty of my self portrait in oil.
Back to stage 1 of creating the piece = drawing. Due to time constraints I traced out the face, from a photograph, on tracing paper and created a line drawing with the bed bug line (the line where the shadow meets the light).
The back of the tracing paper was rubbed down with vine charcoal. I then place it on top of the prepared ground (in this case canvas board rubbed down with a neutral color). Then the tracing paper was lined up over the canvas board until I had an adequate composition. I taped it down and retraced the line, imprinting charcoal onto the ground.
I use raw umber thinned with mineral spirits to draw in the lines. This is to set down the composition and is referred to as the "cartoon". The lines emphasize the high and low points. Rather than use curvilinear lines that drift into inaccuracy, these are made up of small straight ones.
The next step is to block in the shadows. I use burnt umber and white and begin the dead coloring starting with the shadow.
The next step is dead coloring the mid-tones in the lit side. This color was made of the base flesh tone ( red + yellow ochre + white) plus some red umber if needed for your model. I loosely filled in the mid-tones of the background with a mix of black, yellow ochre and a touch of flake (lead) white. The background could be done thicker but scrubbing it in quickly is fine since I will be going over it again.
I began filling in the fall of light doing the big for modelling. You can see the highlight on the left side near the eye and it drops off. The focus here is getting the basic fall like on the flesh ball example.
Here is is more softly blended with the additional tones added to create more form in the hair. As well you can notice the repainted flat background. After this dries I will have a chance to continue on with the first painting stage.

.JPG)


No comments:
Post a Comment