Showing posts with label 2 point perspective. Show all posts

March 8, 2017

A bunch of fun and interesting stuff

I have all sorts of goodies here, starting with some whiteboard notes from my Monday evening cartooning class at ACAD. Here is my ACAD classroom before the students arrive.


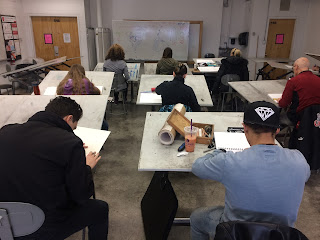
And the other direction from my Drawing 1 class on Saturday working on perspective


 At my atelier (http://atelierartista.com) I have a whole bunch of great courses in drawing and painting you can take, visit my website for more info and to sign up HERE.

 We are working on portraits for the upcoming peoples portrait prize at cSPACE King Edward.

I also have a figure drawing evening at ACAD and on Wednesday evenings at the atelier as well as anatomy classes, here is a glimpse of some of the demonstation notes.


 I left a little skeleton surprise for the gals in the Con Ed department after leaving my figure drawing class for the evening.
 It looks like one is about to be kicked to the curb hard. lol.
After all, it's good to keep life and art a little lighthearted!

July 24, 2014

Erase me. White board notes from my Teen cartooning class.

I may hate drawing with white board/ dry erase markers but I sure do love teaching, so if thats what it takes then I'll battle the materials.  Here are some of this weeks white board notes from my Teen cartooning Camp at the Alberta College of Art and Design. In the past few days we have covered a lot. Tomorrow they will be finishing and presenting their final pieces for critique and I can't wait to see what the final products look like.
Here is a simple revolver in 1 point perspective and below showing how to construct a car using boxes in perspective. The board gets so dirty that the markers erase the layers as they write, time for a good wipe down.
We did a whole day where our goal is to describe form that appears 3D but is drawn on a two dimensional surface, our sketchbook paper.  Drawing creates an illusion after all.

We covered all the types and methods for drawing forms in space, including isometric projection and perspective drawing. Above is my kitchen interior in one point perspective.

We did some 3-point perspective afterward (worms eye and birds eye view) It is a little bit more difficult but it is incredibly useful for cartoon and comic artists. We also went over foreshortening and  how to draw ellipses,  and circles in perspective using only straight edges.
We also focused on the figure and superhero poses using a 5 step development process. The notes didn't get complete as I was going around and working at each and every students station based on their individual needs and then the day just seemed to evaporate in to the class ending.

1. Sketch a skeleton in the position you want with the desired proportions
2. Flush out the forms using simple shapes like cylinders
3. Refine the details, clothing etc.
4. Ink and erase the pencil lines
5. Shade and create form on the figure


We also drew a variety of hands using a few methods, including the Preston Blair method of simple circles which is really quick and effective to learn. I've drawn tens of thousands of hands this way. We then went into the anatomy of the skull and how to draw and create faces.

We spent a the better part of class figuring out layout and panel designs. This was by far my most fun set of teaching notes of the week. Not only that it is packed with useful information!
 This is a sketch one of the students did that was just so simple, elegant and beautiful I asked permission to take a picture to share with you here. Isn't it awesome?! I love it, it communicates everything it needs to with so few lines.


July 18, 2013

Sniffing markers is part of the job!

I've been teaching my Cartooning class to teens all this week at ACAD. They are a good little group quietly drawing their assignments as I write this post. I have also been teaching evening classes which has me swamped, but its the good kind,  art day and night.

Here are some examples of the notes I write up on ye ol' whiteboard. I do hate using these pens. But it helps to accompany my hand outs. All in a days work!
 Here are some character design and how to flesh out the character from the skeleton. Also some angry birds just for fun.
 
We start every class with some drawing exercises I listed off some objects from them to draw from their imaginations we also do a little blind contour.


 From the perspective drawing classes. Above is one point perspective examples, landscape and a room interrior.
 I drew graphical boxes from a single vanishing point and a gun in 1 point perspective.
 We moved into two point perspective practice. Here are 9 cubes floating in 2 point perspective space, above and below the horizon.
 My white board is really starting to get mucky. We drew a bunch of bird houses in 2 point perspective as well, seen here in blue dry erase marker.
 We also did a room interior applying the rules of 2 point perspective.
 We moved onto 3 point perspective and did many examples of worms eye view and birds eye view, then tried the bird house again. I did an example using a basic stair case sketch covering all the methods we covered: isometric drawing, i point, 2 point and three point perspective.
 I explained foreshortening and ellipses and how to draw ellipses properly using a nifty geometry trick. We turned our elliptical shapes into useful drawings and drew soda bottles with liquid in them at varying angles.
I covered layout design, word bubbles, onomatopoeia, timing and text on this white board panel. Then the students got to work on their assignments, leaving me with an opportunity to update this blog.
I hope you enjoy. Don't forget to check out the Vanageddon show this Friday and Saturday only!!

FB info and event page is here.


July 26, 2012

Perspective

Been on a blogging hiatus lately.  Doesn't mean I haven't keep busy.....

I have been teaching a cartooning course at ACAD on Wednesday evenings. This weeks class was on Perspective.
We covered how to draw three dimensional objects such as cubes and how to use this to do drafting and isometric drawings. I then had the students do a quick exercise where they created their name in block letters. I then taught them one and two point perspective. The students had to draw a city scape in both one and two point perspective.
I filled the board with other examples but didn't snap a shot for this blog. Then, I decided to take the idea of the block letters from before and used the techniques of two point perspective to do a large example on the whiteboard.
To the right you can see how I drew stacked cubes above, bisected and below the green horizon line. The vanishing points are marked in red. The sketch lines were done in blue. The shapes are inked in black. I also challenged them to try drawing a room interior in both 1 and 2 point perspective.
Same room, different view. Next week we will cover 3 point perspective ( birds eye and worms eye view) Exciting!!!

May 3, 2010

MUSIC BOX

I applied to Artcity 2010 today with my idea to build a combination automata/music box. I want to make it about 4 ft wide and install it in the downtown core for people to enjoy.  Here is one of the design sketches for the piece.


For the drawing nerds, that is 2 point perspective and it worked out that the back leg can't be seen from this angle. Convenient.