January 16, 2013

Draw 'til you drop - figure drawing Day 2, afternoonsession

Drawing the nude from life.
Here are two from the morning session done on watercolour  paper.
I like how loose and soft they are and how the charcoal looks dry on this paper when it is not smudged.
 Here is the next model, i a 45min. - hour pose drawn with red pencil on canvas paper.

Here is the better part of this piece up close to reveal the texture of the pad.


This is the next standing pose, drawn first in pencil then the model took a break.
 After the break I felt inspired to use some copic markers, which dragged the charcoal all over the place and wrecked their tips, but it made for an interesting experiment.
 Here is a final piece from this session done on compressed charcoal.


January 15, 2013

Draw 'til you drop - figure drawing Day 2, morning session

It was tough to get up and out of bed the next morning, but when I did I was super stoked to be undertaking another full day of drawing the figure.  We began with "Diane" and some quick 1 min gestural drawings.
I started by using the side of a 3B graphite pencil.
Then used various Copic markers, because you have to commit when using ink.
Then we did some two minute poses. I like the right one with the arching back.
 Some other quickies to establish the poses in a short period of time.
 Some 5 minute poses in compressed charcoal and red pencil.
Followed by some 5 min. ones that I did in a variety of ink.
What a way to warm up on the first session....back to materials that blend easy.
This lying down pose was done with vine charcoal.
The next were 10 - 15 min poses, done in red pencil. See the reflection in the mirror?
The mirror adds a really nice element and challenge to the task of drawing.
I did this one in Copic multi-liner and brush pen.
Here is the finished page while in the morning session =:D


January 13, 2013

Draw 'til you drop - figure drawing Day 1 - afternoon session

Well by break time I needed a little coffee, it was a really late night and I need some bean juice to keep me going... I did bake vegan chocolate chip squares for the group, now I need something to help wash it down.
Below is the start of my drawing of John. He is to the left of the set up. I am holding the pad on my Mabel french style portable box easel.


I drew this piece with a range of B - 6B pencils on watercolour paper. It just didn't seem right around the head area until I used the blue copic marker to punch it up a bit more.
The last session of the day consisted of a long pose done in a couple of sessions. The great thing about the angle that I was sitting at was the great reflection in the mirror behind the nude model. It took two sittings to get the figure drafted out in red pencil.
Afterward, I worked into the piece over top of the red with graphite on the canvas paper which makes really nice cross hatch like texture when shading. I am really happy with how far my skill has come along throughout the day.
With some time left on the clock, I moved to the opposite side of the room and focused on the models reflection in the mirror. I loosened up my line work and quickly drew this before the wind was completely out of my sails. By 5:10, I dropped ;( 

8+ hours with very little breaks, at I skill I have very little experience with......... I lost my steam. As soon as I got home, I fell into bed for a quick and necessary recovery nap. Wow, this level of intensity really took it out of me, but in a good way.

zzzzzzzzzzzzzzz.


Draw 'til you drop - figure drawing Day 1

Who gets up this early on a Saturday morning, well clearly a lot of artists determined to improve their craft.
 
 The early session began with Charlie and some quick warm up gestural sketches in my sketchbook. I used a red Stadford animation pencil and a little vine charcoal.
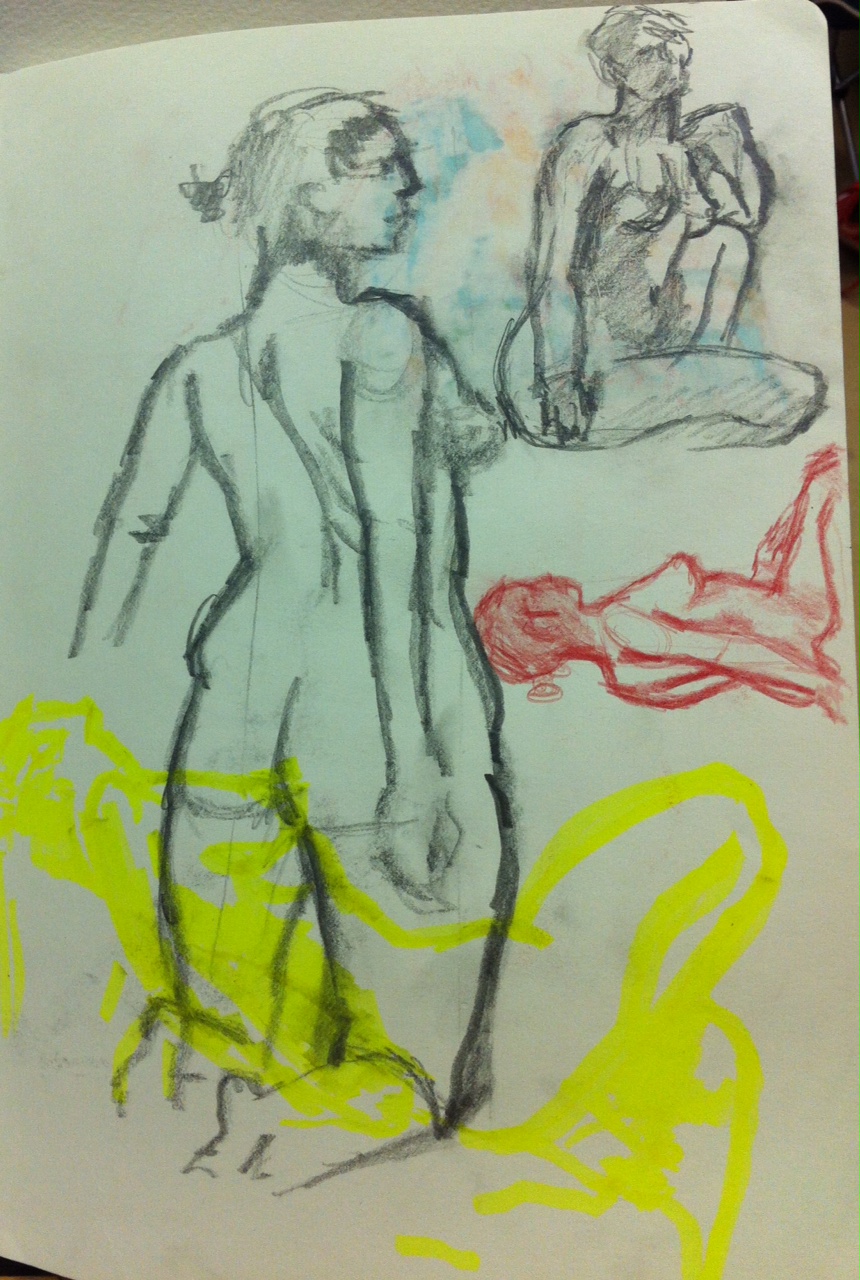
Here are a few more longer poses, the one at the bottom of the page is done in yellow highlighter. I also did a coloured male seated and a laying pose not included in this blog.
This model pose was also coloured with Copic markers in the last remaining 5 min of the pose.
This pose was sketched in vine charcoal on large format bound watercolour paper.
Here is a large charcoal drawing Charlie on canvas paper. I am focusing more on my values while keeping proper proportions while at this week-end drawing extravaganza.


January 9, 2013

Back to dead coloring angel of death

After sitting and looking at the piece again I decided I definitely had to tweak it a bit more in terms of the angle of the body in the composition as well as make the skull bigger on the birds body.
I drew in charcoal right on top of the previous design. I had the bird arch its head further so that it looked a bit more like it was turning around to face the viewer. I also raised the talon up a bit higher and made the skull larger and tilted at a slight angle to work well with the angle of shoulder of the wing.
Here is the small skull model I am using as a reference point for my drawing. The lighting will be different based on my knowledge of the shape, but who knows I may use this quick snapshot more than I anticipate.
I laid out the colours I intended to use for the basic filling in of the body. Cobalt and Cerulean Blue, Green and yellow, Deep, light and cadmium red and Titanium white for mixing. I blended up a 3:1 linseed oil to mineral spirits medium with one drop of cobalt drier to help speed things up a bit.
I blocked in the basic colors of the parrots body as well as the skull with some shadowing to help see the forms. I then took some burnt sienna and put in some of the background tone.
This is where I have the most fun. I use the paint tube as if it were a crayon. The lines are quick and natural and expressive. At times I wonder if this is not my true art form and that I should try to go further with it, and not try to paint things at all. That may be more ballsy that I'm ready for.
I blocked in the remaining background with Burnt Sienna right on the canvas. It really flattens the image out but once it dries there will be much more detailed work done on top. For now, it has richly colored masses to work on.


January 8, 2013

Epcor show installation


Window Galleries - A View Through the Glass

EPCOR CENTRE Window Galleries (across from Max Bell Theatre)
January 10, 2013 – March 31, 2013
Reception: Thursday, February 7, 5 - 8 pm, Upper Centre Court

Today I installed a new exhibition of my sacred images in the main hallway at the Epcor Centre of Performing Arts.
They already had up these placards that they made for me, super rad! I'm definitely keeping this for my records after the show.
I brought a bunch but not all of the pieces from my collection. Some are too graphic and sexual in nature to display in a city run public space. I wasn't sure with the layout and size of the space how the hanging would go. I bought extra wall hangers for way too much money at the frame ship but they were necessary since the art supply store I hit on the way was out.
The difficult thing about the space is hanging the work so that the metal strips down the center of the windows does not hinder the view.  I had odd sizes and the lighting can't be controlled, but you do the best you can with what you've been given. The nice part is the walls are black which really helps to set off my bright colored paintings.
It was a fair bit more challenging than expected to hang the work. The walls were plywood, bending my nails. It was hard to measure off but with a little trial and error I nailed it. No pun intended. Who am I kidding, puns are usually intended. There is still a bit more work to do in terms of adding some writing to help contextualize the work for viewers but other than that the show looks really good.

Here is a link for more info:

http://www.epcorcentre.org/WhatsOn/ShowDetails.aspx?show_id=E442E2DB-8F9C-4DA0-B6B3-414F7410299B

Window Galleries - A View Through the Glass

EPCOR CENTRE Window Galleries (across from Max Bell Theatre)
January 10, 2013 – March 31, 2013
Reception: Thursday, February 7, 5 - 8 pm, Upper Centre Court


January 6, 2013

Angel of death

I began work on a new piece after the preparation of the support.
After a light sanding, I placed the canvas on my favourite new easel and got prepped to do a little prep work on a new image.I measured out around the canvas to create a frame to draw inside of. I learned in previous works to leave a bit more space for framing. Often I would draw my image too close to the edge, now I'm planning ahead.
I drew in my image with charcoal in one go straight on the canvas without measuring etc. Give a little rub here and there to help build up the forms. Afterward, I give a quick spray with the ever so noxious chemical fixative, but not enough to cause too many fumes I have to leave but probably just enough to give me partial brain damage ;P
Using a brush, I slathered on some Bob ross brand Van Dyke brown and scrubbed around the edge. I worked loosely and went around the sides of the canvas so there would be a little colour on the sides and to give me a middle tonal range to work on rather than blaring bright white.
I used the paper towel from drying my hands after washing off all the charcoal to rub the brown over the rest of the canvas. I also wiped out areas where lighter colds will be when I do the next stage. I will let the image sink in. Already, I think I will make the face skull a bit larger on the birds body when I next visit the studio.

January 5, 2013

Steal of a deal.....

I got a quick text from my good friend Ola that there was a damaged canvas available at Inglewood Art Supply and If I wanted she would put it aside for me......
Well to make the story short I said "Hell Yeah!".  It just so happens, I just got asked to be in a show at the Gorilla House in a week plus and I came up with an idea for the given theme. Come back to see what happens next.
I was having a lunch meeting close to the store and swung by right away. The canvas is 24" X 36" the perfect size for my piece.  It was marked down from $40, and by the time it got to the till total cost was $5! What a steal of a deal, thanks Inglewood Art Supply!!!!
I had to take off all the canvas with my trusty pliers while I listened to my favorite radio show on CJSW, the double bounce.  I stretched a nice new piece of 15 ounce canvas as taut as a drum.
Then gave it two coats of gesso and left it to dry overnight.

MEANWHILE...........

I donated some money to a good cause. Imagine being a visual artist and losing your sight. Give the gift of sight like I did here.....

http://www.indiegogo.com/TrespassersEye

and pick up a cool perk like a Cthulhu mug!!

---


January 4, 2013

MAKEshift MASTS

I continued work on my pirate vessel for an upcoming animation with objects residency with CAOS.
I had to take the hull assembly apart because I didn't like how it was fitting. This was not only risky, it was messy too. I had to scape and sand all the annoying bits of hardened model cement. In the end the fit was much more snug and to my liking. Sometimes you just have to put in the extra work to make it worthwhile. I clamped and used elastics to hold it together while it dries.
While the hull is drying I skipped ahead to the mast assembly. They are fragile little pieces made up of many parts glued together. While I can't speak to their stability I can say many pieces make them detailed.
I had to get a little creative to get the masts to be straight when glueing. I put together the base to the upper left and used it to balance a mast assembly upside down on the tallest mast to help the multiple joints dry perpendicular to the table.
Onto itself it is a kinda neat object. I had to pack everything up and move this project aside for another day since I just had something come up that needs to take precedence over the next couple of days.